• Sign Up! To view all forums and unlock additional cool features

    Welcome to the #1 Dodge, Jeep and RAM Forum dedicated to FCA owners and enthusiasts. Register for an account, it's free and it's easy, so don't hesitate to join the SRT Forum today!


Uneven wear on DR's

OP
Decay

Decay

Active Member
Founding Member
Member ID
#1119
Messages
478
Reactions
678
Likes
67
City
Astoria
State
OR
Country
United States
Vehicle
2019 widebody Redeye
Thread Starter #61
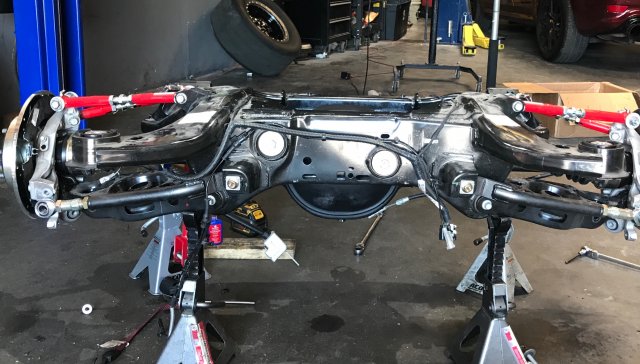
This alignment took adjustable four corners by AAD, plus the BMR rear toe adjustable items. It ran a 3.3 second 0-60 and 11 sec flat on the street with street tires. It don't flipping hop anymore either. It feels out of this world to drive now, big difference from stock.

View attachment 16398
Did you drop the cross member or go the sawzall route?
Not that I am going to do anything prior to time slips but the AAD kit is on sale and it doesn't look like that big of a deal to do the cross member drop.


DGatzby

7000 Posts Club
Founding Member
Premium Account
U.S. Air Force Veteran
Donating Member
HFCOTM & HFCOTY
Member ID
#797
Messages
7,249
Reactions
46,445
Likes
402
City
SW Twin Cities
State
MN
Country
United States
Vehicle
2019 Dodge Challenger Redeye WB
#62
Did you drop the cross member or go the sawzall route?
Not that I am going to do anything prior to time slips but the AAD kit is on sale and it doesn't look like that big of a deal to do the cross member drop.
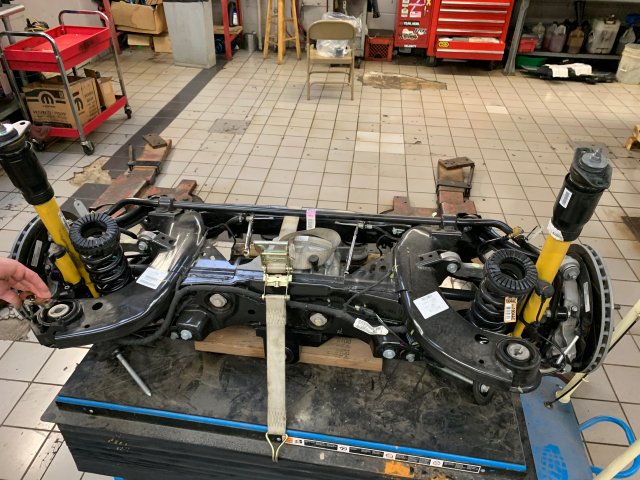
I also changed the rear cradle bushings. So I paid for it, and it was a PIA they told me.
IMG_1395.jpg IMG_1398.jpg


Hpindy

4000 Posts Club
Founding Member
9 Second Best E/T
HFCOTM
Member ID
#974
Messages
4,875
Reactions
11,023
Likes
302
City
Jackson's Point
State
Non-US
Country
Canada
Vehicle
2018 challenger hellcat
#63
When I changed my control arms and installed the cradle lock out kit I just did 1 side at a time by only lowering that 1 side .

Sent from my BBF100-2 using Tapatalk


16GoManGoHC2

3000 Posts Club
Founding Member
9 Second Best E/T
Member ID
#1139
Messages
3,471
Reactions
8,211
Likes
252
City
Nanticoke
State
PA
Country
United States
Vehicle
2016 Challenger He’ll Cat
#64
When I changed my control arms and installed the cradle lock out kit I just did 1 side at a time by only lowering that 1 side .

Sent from my BBF100-2 using Tapatalk
So you didn’t take the exhaust completely off, disconnect the DS and the fuel filler tube etc like the BMR instructions say? I’m hoping to hear NO lol


16GoManGoHC2

3000 Posts Club
Founding Member
9 Second Best E/T
Member ID
#1139
Messages
3,471
Reactions
8,211
Likes
252
City
Nanticoke
State
PA
Country
United States
Vehicle
2016 Challenger He’ll Cat
#65
I’m doing this as well
28367868-F5F1-4A8F-B6FF-4B6828C5DE7D.png


Old Mopar Guy

2000 Posts Club
Founding Member
Donating Member
HFCOTM
Member ID
#1198
Messages
2,487
Reactions
6,831
Likes
302
City
Long Island
State
NY
Country
United States
Vehicle
15 Hellcat Challenger
#66
So you didn’t take the exhaust completely off, disconnect the DS and the fuel filler tube etc like the BMR instructions say? I’m hoping to hear NO lol
I followed Hp’s instructions for the installation of that BMR Cradle Lock Out Kit and had it done in less than 2.5 hrs. Dropped one side at a time as he instructed. Maybe 2 inches at most. Biggest pita was drilling and hammering off the limiter plates, but with a sharp drill bit, not all that bad. Generic instructions BMR provide are not nexessary for us. No dropping exhaust or filler neck. I don’t know about the center section kit above but am also interested in doing that as well. Pls let us know how that one goes.
B5D2615E-ADC9-423D-8CF1-2773DDC728A9.png BC36B293-BE0A-4542-95AD-D7590C4CD58B.png


Last edited:

moparjim

1000 Posts Club
Founding Member
10 Second Best E/T
HFCOTM
Member ID
#1084
Messages
1,757
Reactions
4,380
Likes
212
City
Vaudreuil
State
Non-US
Country
Canada
Vehicle
2016 Challenger Hellcat
#67
I followed Hp’s instructions for the installation of that BMR Cradle Lock Out Kit and had it done in less than 2.5 hrs. Dropped one side at a time as he instructed. Maybe 2 inches at most. Biggest pita was drilling and hammering off the limiter plates, but with a sharp drill bit, not all that bad. Generic instructions BMR provide are not nexessary for us. No dropping exhaust or filler neck. I don’t know about the center section kit above but am also interested in doing that as well. Pls let us know how that one goes.
I did mine the same way. The limiter plate wasn't as bad as I thought. I drilled in the side then over about 1/4 the way around I drilled up into the plate. Not through but enough to weaken it. Couple of hits on a big screwdriver to get it to start twisting. Then it popped off with little effort using a pry bar. I used single edge razor blades to cut the bumps off the rubber. Then a new one and cut the rest off to the metal.
I was surprised it went so well.


Marc W

3000 Posts Club
Founding Member
U.S. Navy Veteran
Firefighter
8 Second Best E/T
HFCOTM
Member ID
#993
Messages
3,431
Reactions
11,005
Likes
302
City
St. George
State
UT
Country
United States
Vehicle
2016 Dodge Challenger Hellcat
HFCOTM
View Images
#68
I followed Hp’s instructions for the installation of that BMR Cradle Lock Out Kit and had it done in less than 2.5 hrs. Dropped one side at a time as he instructed. Maybe 2 inches at most. Biggest pita was drilling and hammering off the limiter plates, but with a sharp drill bit, not all that bad. Generic instructions BMR provide are not nexessary for us. No dropping exhaust or filler neck. I don’t know about the center section kit above but am also interested in doing that as well. Pls let us know how that one goes.
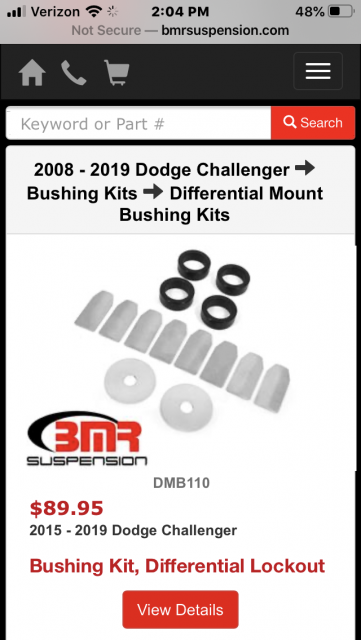
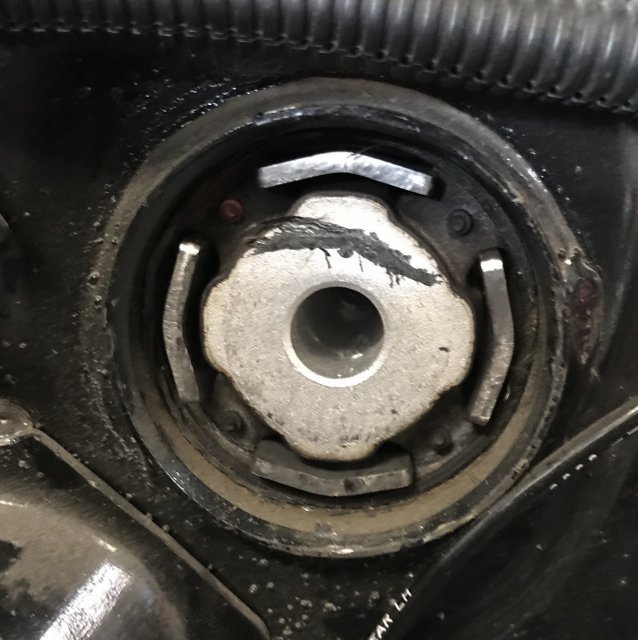
With the differential kit, the fronts are not a problem. Those rears though are. They are just steel shims that get driven into the rubber isolators to firm them up. The bolt on the right comes out, but the one on the left does not because it’s too long and hits the trunk tire well where it hangs down in back of the differential. You could take a hole saw and cut out a opening to back the bolt into but unless you’re willing to do that, you will have to lower the cradle a lot more than a couple inches.


Hpindy

4000 Posts Club
Founding Member
9 Second Best E/T
HFCOTM
Member ID
#974
Messages
4,875
Reactions
11,023
Likes
302
City
Jackson's Point
State
Non-US
Country
Canada
Vehicle
2018 challenger hellcat
#69
So you didn’t take the exhaust completely off, disconnect the DS and the fuel filler tube etc like the BMR instructions say? I’m hoping to hear NO lol
No need to drop the exhaust , filler neck, or anything . Just drill the limiting plate to split it the knock it off . The cut the rubber bumps out of the the way ( I finished with a die grinder and a sand paper roll to get ALL the rubber off and down to the metal ) . Then put a jack under the control arm and both cradle bolts from that side and lower it enough to slip both top rings in . Press them into place with a screw driver or pry bar just to make sure they are fully sewed. Then jack back up into place . Insert factory bolts threw appropriate lower lock out pieces then thread in by hand . Then torque to factory specs . Repeat on the other side . Check torque after 100 miles or so .

Sent from my BBF100-2 using Tapatalk


Old Mopar Guy

2000 Posts Club
Founding Member
Donating Member
HFCOTM
Member ID
#1198
Messages
2,487
Reactions
6,831
Likes
302
City
Long Island
State
NY
Country
United States
Vehicle
15 Hellcat Challenger
#70
So Marc, do you suppose one can get 1/2 of the collars and shims in without dropping and drilling, and would there be any benefit to half-assing it like that?
eta- the more I think about it the more I think it would be more detrimental as we are talking left and right, not front to rear.


Last edited:

16GoManGoHC2

3000 Posts Club
Founding Member
9 Second Best E/T
Member ID
#1139
Messages
3,471
Reactions
8,211
Likes
252
City
Nanticoke
State
PA
Country
United States
Vehicle
2016 Challenger He’ll Cat
#71
All good info, I wasn’t really looking forward to dropping the whole Shabang, I work alone and getting stuff back up in place alone SUCKS lol
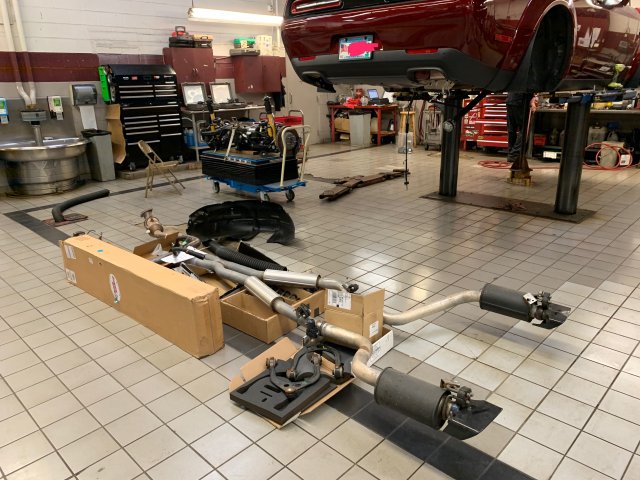
I’ll let everyone know how the Diff kit goes, I don’t like drilling holes in my cars no matter how small let alone holes saw size lol, that kit may wait if that’s the case. The arms and cradle lock out the most important to get done.


Old Mopar Guy

2000 Posts Club
Founding Member
Donating Member
HFCOTM
Member ID
#1198
Messages
2,487
Reactions
6,831
Likes
302
City
Long Island
State
NY
Country
United States
Vehicle
15 Hellcat Challenger
#72
If I were closer I’d give you a hand with it as I too work alone. It’s not as tough as it seems though. I put a little grease on each metal collar before inserting them onto whats left of the bushing just to make certain they went in square and didn't squeak. Prob not necessary but why not either?
PS. I put my floor jack with a piece of wood under the ham to move it up and down until I had the access I needed.


16GoManGoHC2

3000 Posts Club
Founding Member
9 Second Best E/T
Member ID
#1139
Messages
3,471
Reactions
8,211
Likes
252
City
Nanticoke
State
PA
Country
United States
Vehicle
2016 Challenger He’ll Cat
#73
Appreciate that offer, would be nice. I’m going Adjustable Shocks on my buddies mustang tonight So he’s going to owe me :)


Marc W

3000 Posts Club
Founding Member
U.S. Navy Veteran
Firefighter
8 Second Best E/T
HFCOTM
Member ID
#993
Messages
3,431
Reactions
11,005
Likes
302
City
St. George
State
UT
Country
United States
Vehicle
2016 Dodge Challenger Hellcat
HFCOTM
View Images
#74
So Marc, do you suppose one can get 1/2 of the collars and shims in without dropping and drilling, and would there be any benefit to half-assing it like that?
eta- the more I think about it the more I think it would be more detrimental as we are talking left and right, not front to rear.
You can definitely do the one side but I didn’t want to do that either. I just did the fronts and kept the shims for another day. That day came when I went to the 9” conversion. The front mounting points are eliminated with that but the rears are still used. The cradle got dropped all the way when that was done and that gave us the opportunity to do the rears.


Hpindy

4000 Posts Club
Founding Member
9 Second Best E/T
HFCOTM
Member ID
#974
Messages
4,875
Reactions
11,023
Likes
302
City
Jackson's Point
State
Non-US
Country
Canada
Vehicle
2018 challenger hellcat
#75
You can definitely do the one side but I didn’t want to do that either. I just did the fronts and kept the shims for another day. That day came when I went to the 9” conversion. The front mounting points are eliminated with that but the rears are still used. The cradle got dropped all the way when that was done and that gave us the opportunity to do the rears.
Do you still have the front pieces? @Marc W

Sent from my BBF100-2 using Tapatalk


Marc W

3000 Posts Club
Founding Member
U.S. Navy Veteran
Firefighter
8 Second Best E/T
HFCOTM
Member ID
#993
Messages
3,431
Reactions
11,005
Likes
302
City
St. George
State
UT
Country
United States
Vehicle
2016 Dodge Challenger Hellcat
HFCOTM
View Images
#76
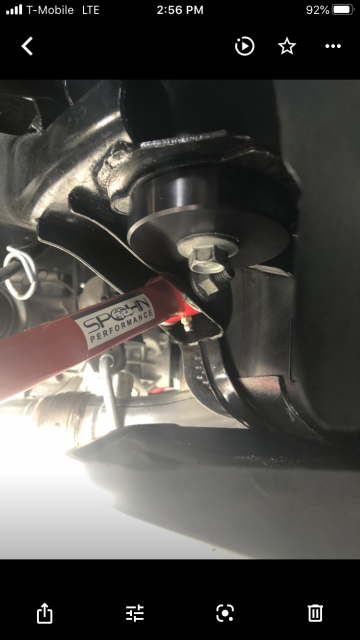
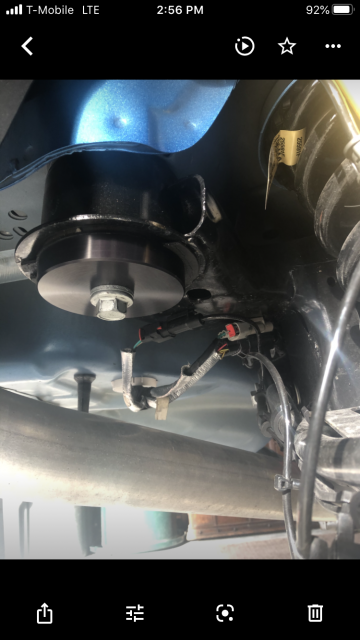
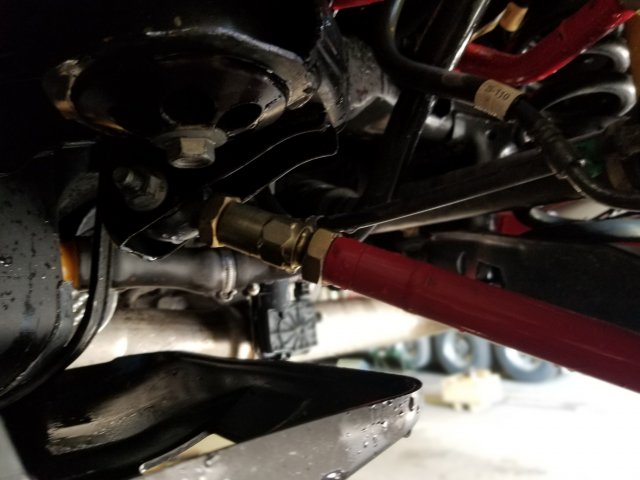
Here are a couple pictures of those rear diff “lock outs”. You can see the four shims that are pounded into slots in the rubber. From the rear with the cradle down you can see hw much higher the rear diff attachment point is on the left. There’s just no way to get that long bolt out without dropping the cradle unless you cut a access hole inside the trunk. 468D9F7A-BB44-4928-819B-17E730B07A2C.jpeg 8E1410DE-F1CF-4FFC-8617-8E202311144A.jpeg


Marc W

3000 Posts Club
Founding Member
U.S. Navy Veteran
Firefighter
8 Second Best E/T
HFCOTM
Member ID
#993
Messages
3,431
Reactions
11,005
Likes
302
City
St. George
State
UT
Country
United States
Vehicle
2016 Dodge Challenger Hellcat
HFCOTM
View Images
#77
Do you still have the front pieces? @Marc W

Sent from my BBF100-2 using Tapatalk
Oh man!! You’re hurting my brain!! I have no idea where stuff like that has gone. I’ll 👀


Old Mopar Guy

2000 Posts Club
Founding Member
Donating Member
HFCOTM
Member ID
#1198
Messages
2,487
Reactions
6,831
Likes
302
City
Long Island
State
NY
Country
United States
Vehicle
15 Hellcat Challenger
#78
Ok thanks. So those bolts come out, shims get hammered in, then the collars are inserted and the bolts replaced using the new washers. Guess I wont bother as doing one side is ng. Thanks as always Marc.


Hpindy

4000 Posts Club
Founding Member
9 Second Best E/T
HFCOTM
Member ID
#974
Messages
4,875
Reactions
11,023
Likes
302
City
Jackson's Point
State
Non-US
Country
Canada
Vehicle
2018 challenger hellcat
#79
Oh man!! You’re hurting my brain!! I have no idea where stuff like that has gone. I’ll
Lol . If you find them and want to part with them I call dibs.

Sent from my BBF100-2 using Tapatalk


Bboyd

Active Member
9 Second Best E/T
Member ID
#1591
Messages
400
Reactions
793
Likes
67
City
Monongahla
State
PA
Country
United States
Vehicle
2017 Hellcat
#80
20200427_160017_resized.jpg 20200427_155956_resized.jpg 20200427_160007_resized.jpg


Top